
Here are the basics of how to make latte art! These tips for beginners will get you started practicing in the comfort of your own home.

Want to learn how to make latte art…in the comfort of your own home? We’re here to help! We’re A Couple Cooks, two coffee obsessed home baristas (and mixologists). After years of practice, we’re ready to unveil our tips on how to make latte art at home! If you’re a professional barista, this is not the post for you. But if you’re a beginner with an espresso machine ready to learn the basics…let’s get started!
How to make latte art: video tutorial!
Latte art is a way to prepare a latte where the microfoam forms a design on the surface. It’s a complex process to master because of the specific quality of steamed milk that’s required. Professional baristas can make extremely intricate designs (and there are even latte art competitions).
This tutorial is intended for beginners who have an espresso machine with steamer and want to try basic designs at home. The best way to learn this skill is by watching it. So watch this video tutorial first, then we’ll break down all the basics below.
Required: espresso machine with steaming wand
To make latte art, you must have an espresso machine with steaming wand. Why is it required?
- You have to achieve perfect microfoam to make latte art. Microfoam has the magic “wet paint” texture that lets you draw the designs in the espresso. You simply cannot achieve this with a milk frother: though it makes a tasty latte!
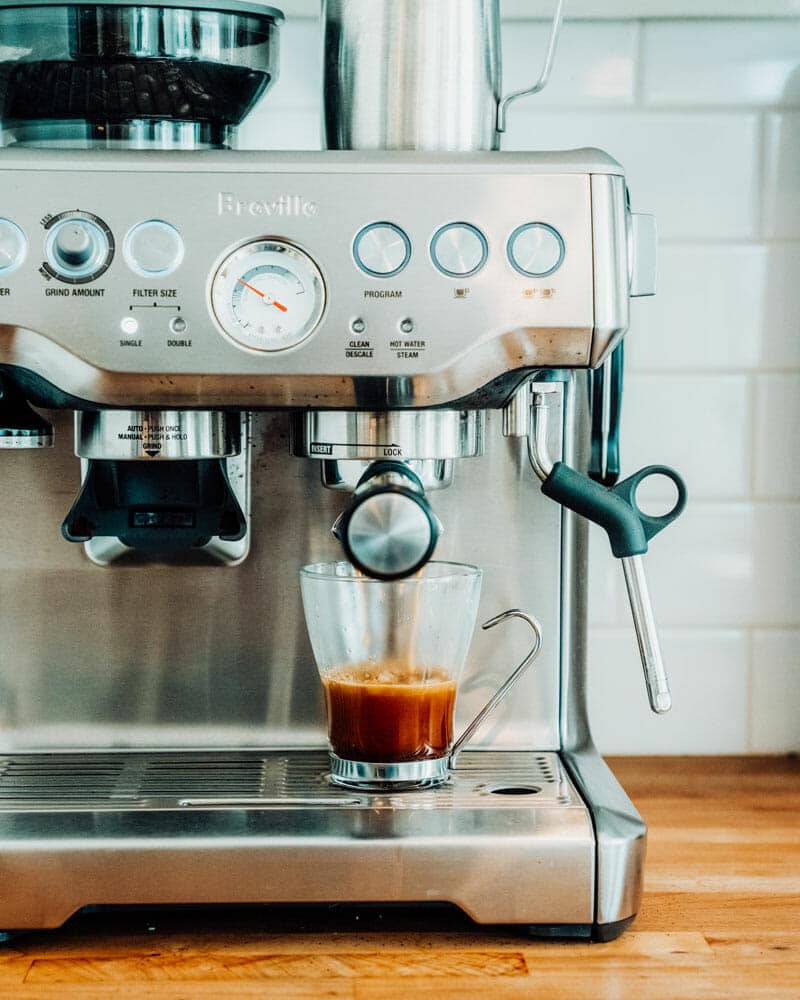
- What’s the best espresso machine? Here’s the espresso machine we use: it’s middle of the road price-wise and works great. We tried a lower price range espresso machine but it didn’t get quite the quality of steamed milk that this one does. So it’s worth investing a little more for quality, in our opinion.
What’s so special about microfoam?
Microfoam what’s behind great latte art, and it’s a difficult thing to achieve. You’re looking for an almost “wet-paint” like texture. Also called velvet milk, it’s shiny and has very tiny, uniform bubbles. It’s silky smooth and has a sweet, almost nutty flavor that makes just the right espresso drink.
If you can’t achieve just the right texture and the right amount of bubbles, it’s impossible to make latte art. It can take months to figure out just the right touch using your espresso machine and equipment. Don’t give up! Practice makes perfect here.
What you need to make latte art
There are several specific things you need to make latte art, outside of the espresso machine of course! Here’s what to make sure you have on hand:
- Espresso machine with steaming wand: we use this Breville espresso machine; it’s helpful to have a mid to high quality espresso machine to get just the right steamed milk microfoam
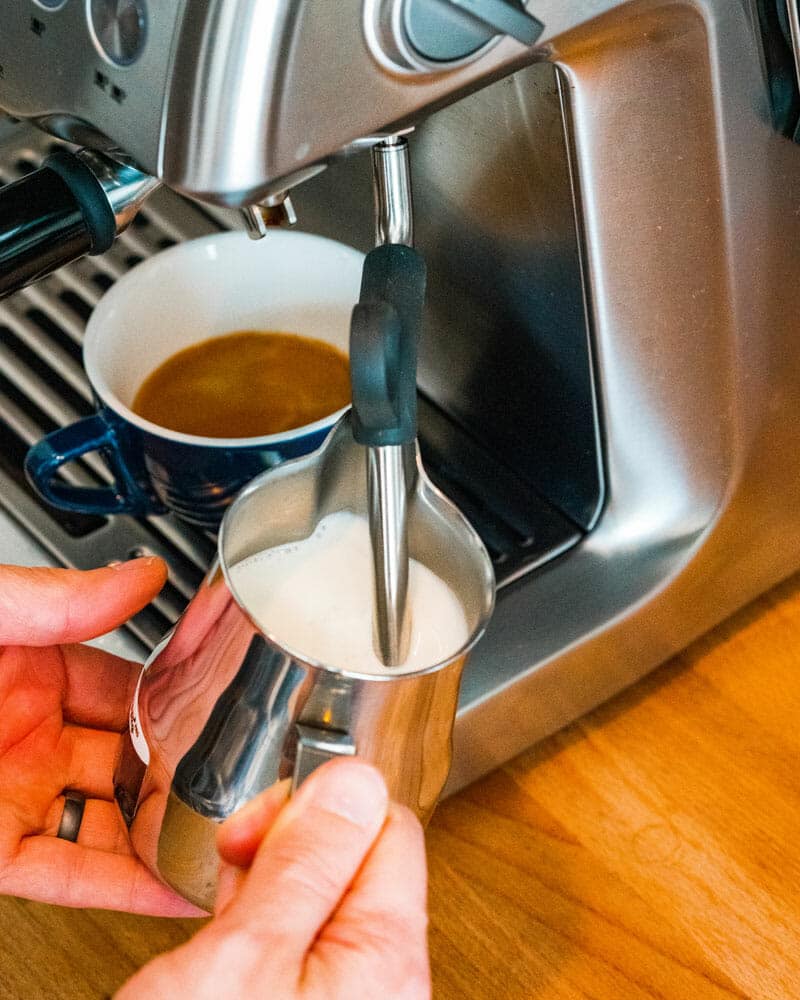
- Metal pitcher with temperature sticker: Use a metal pitcher and chill it beforehand, which helps because the colder the milk, the longer time you have to steam it. Even better, grab a metal pitcher with a temperature sticker, which easily lets you see when it’s at the perfect temperature! You can also use a handheld thermometer, or judge by hand (go to the recipe below).
- 6 ounce mug. It’s easiest to make latte art when you have a mug that’s the final size of the drink. This helps you add just the right amount of milk. We use these 6 ounce mugs and they work great!
Best milk for steaming
In order to make perfect latte art, you have to start with the right raw material! The absolute best latte art is made with whole milk. You can try oat milk for dairy free, but it’s just not the same.
- Use whole milk. Whole milk makes the best microfoam because it has the highest milk fat.
- Important: make sure the milk is as fresh as possible! Milk that’s getting closer to its expiration date does not foam as well. (Trust us, we know from experience!)
- You can try oat milk for dairy free. Oat milk does froth up better than any non-dairy milk, but it simply doesn’t make the same quality latte art as a full-fat whole milk.

Important tips for how to do latte art at home
Ready to get started? Before you scroll down to the recipe below, here’s what to know about how to make latte art at home:
- Grab your espresso machine, fresh whole milk, metal pitcher and 6 ounce mugs. See the sections above for details. Store your metal pitcher in the fridge, because the colder the milk, the longer time you have to steam it to the perfect microfoam.
- Read How to Steam Milk to learn how to achieve microfoam. Latte art is all about achieving the right microfoam, so that’s 95% of the process.
- Watch the video above. Watch it as many times as possible before you go to the recipe below!
- Practice, practice, practice. You have to be very confident in your movements to make great latte art. Slow movements result in poor quality latte art: but it’s still drinkable! Keep practicing until you’re able to make each design with better control.

Latte art designs
The recipe below shows you how to make a tulip shape of latte art. But there are lots of easy designs for beginners! Here are some ideas:
- Tulip: see recipe below
- Rosetta: see these instructions
- Heart: see this video
Ready to get started?
Scroll down to the recipe and let’s get going!
Print Latte Art (The Basics!)
- Prep Time: 10 minutes
- Cook Time: 0 minutes
- Total Time: 10 minutes
- Yield: 1 drink 1x
Description
Here are the basics of how to make latte art! These tips for beginners will get you started practicing in the comfort of your own home.
Ingredients
- 2 espresso shots (2 ounces)
- 4 ounces steamed milk
Instructions
- Prep for the latte art: Grind and tamp the espresso, but don’t pull it. Store your milk jug in the refrigerator: the colder the milk is the more time you have to get the right texture. Or, rinse it in very cold water, dry and refrigerate for a few minutes. Fill your milk jug to just below the spout, about ¾ cup, using very fresh whole milk (or oat milk for vegan).
- Make the espresso: Use an espresso machine to make two shots of espresso and pour it into a mug.
- Steam the milk: Heat the steam wand. Once prepared, place the wand just below the surface of the milk about ½ inch from the side, tilting the jug slightly. Keep it in that position for about 5 to 10 seconds, stretching the milk by about 30% in height, with very slight movements up and down. Once stretched and slightly foamy, lower the nozzle about another ½ inch and tilt the pitcher just enough to get a spinning vortex, which incorporates the foam, turning it into a velvety microfoam. Keep that still and spinning until the temperature is about 150 degrees Fahrenheit. (Using a pitcher with a temperature sticker is very helpful.) Turn off the steam before removing the wand from the jug. Wipe the wand with a clean cloth. Turn it on for 1 second to purge the nozzle. Tap and swirl the pitcher to incorporate any bubbles on top. The final texture should look like wet paint or melted ice cream, smooth and velvety. You’ll use only about half of this quantity and can discard the rest (see the * note below).
- Make the latte art (watch the video first!): Tap the milk container on counter and swirl it to break down any large bubbles. Hold the jug a few inches above the coffee and pour in enough milk to fill the mug about halfway, swirling to incorporate the milk. Then lower the jug all the way to the surface. Tilt the mug 45 degrees towards yourself. Pour the milk into the center of the mug while jiggling the jug left to right to make the heart design (for the leaves), then lift and make another heart design on top (the tulip flower). When the mug is almost full, lift the jug and draw a line through the center to make the stem. Make sure to watch the entire video several times to see how to form the tulip shape. This takes practice to perfect (it took us months!). Good luck and let us know any questions in the comments below.
Notes
*This makes enough for 2 drinks, because it’s easiest to steam a larger quantity of milk. Discard the extra milk. If you have an espresso machine with two espresso taps, you could use this to make another flat white. (The milk becomes less frothy while it sits, so it’s not ideal for waiting to make another espresso.)
- Category: Drink
- Method: Espresso machine
- Cuisine: Espresso
- Diet: Vegetarian
Keywords: Latte art, how to make latte art, how to do latte art


I have made thousands of lattes with every type of milk, stonyfield organic whole milk is the best for latte art I’ve used. Regular whole milk is ok, but something about the organic stuff is just so much better for latte art.
Thank you!
★★★★★