
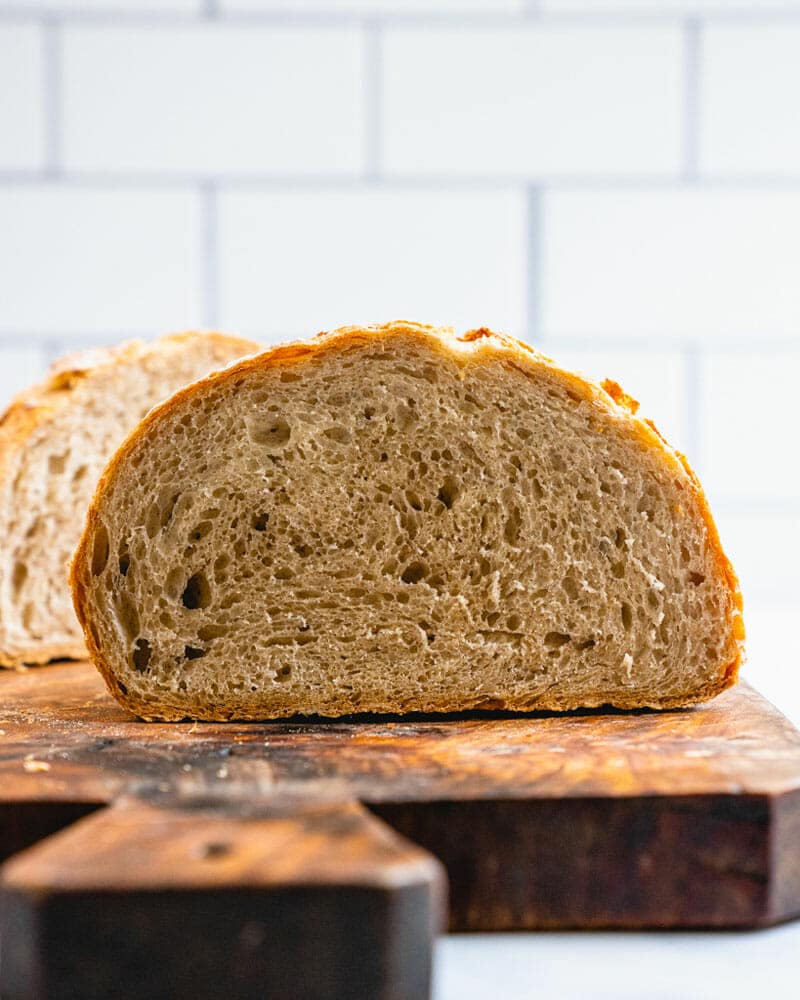
This homemade no knead bread will wow everyone! It’s so easy to make and has the best flavor, crispy crust, and chewy interior. Great for beginners!

Want to bake easy homemade bread, but not sure where to start? Try this best no knead bread recipe! Your friends and family will sing your praises. Neighbors following the wafting smell will come flocking. You’ll get multiple marriage proposals. Yes, this bread is life changing! It’s got the best flavor: lightly tangy and robust. The exterior is the perfect crisp crust, and the interior has the perfect moist chewiness. Even better: it’s our easiest bread recipe yet. If you’re a bread baking beginner, this is the place to start.
Want an even quicker loaf bread? Try our Easy Homemade Bread or Easy Whole Wheat Bread, which are made with a loaf pan and take just 2.5 hours.
How to make no knead bread: an overview!
Here’s the basic outline of what you’re getting yourself into with no knead bread. The process takes 5 minutes the night before, and then about 2 hours the day of. Compared to our sourdough bread and even our artisan bread, it’s the quickest and easiest bread recipe we have. (But if you want to make a bread recipe in one day, the artisan bread is your best option.) Here’s an outline of what you’ll have to do:
| Mix, Rest overnight | 5 minutes active, 12 to 18 hours hands off |
| Shape & Proof | 5 minutes active, 1 hour hands off |
| Bake | 40 minutes, hands off |
| Cool | 45 minutes, hands off |

Equipment list for no knead bread
Making no knead bread requires a few tools. It’s easiest to make with a Dutch oven, but you can also use a pizza stone. There are several optional tools as well that make things easier, but are not required. Here’s what you need!
Required tools for this artisan no knead bread recipe
- Large dutch oven OR pizza stone with steam (see below)
- Plastic bag for proofing (reuse it every time you make bread) or plastic wrap
- Parchment paper
- Lame OR sharp knife for scoring the bread
- Kitchen scale for measuring (optional)
The flours you’ll use
This best easy no knead bread recipe uses a mix of just two flours you’ll probably already have in your pantry. Unlike some of our other bread recipes, there’s no need for bread flour. Here’s what you’ll need:
- All-purpose flour (for texture
- Whole wheat flour (for flavor)
Think ahead! No knead bread rests overnight
This bread requires thinking ahead 1 day. You’ll need to rest the bread dough overnight. Why? Well, the answer has to do with proofing.
- No knead bread requires only 1 proof. Proofing is simply letting the bread stand at room temperature while the leavener (yeast or sourdough) does its magic to help the bread rise. Usually a proof is about 45 minutes to 1 hour. Both our sourdough bread and artisan bread require folding and “proofing” the bread multiple times. So doing only 1 proof is almost unheard of!
- The tradeoff? Resting overnight. Proofing is hands off, but it does require a lot of time to fold and proof multiple times. The tradeoff: you’ll need to rest the bread at room temperature overnight. To us, that’s a very worthy tradeoff! You save hours of bread making time the day of baking.
How to shape the boule
The main part of making no knead bread that requires technique is shaping the dough. You’ll shape it into a ball, called a boule. It’s easiest to learn how to shape the dough by watching. Here’s a video instruction for shaping the boule.
How to score the bread
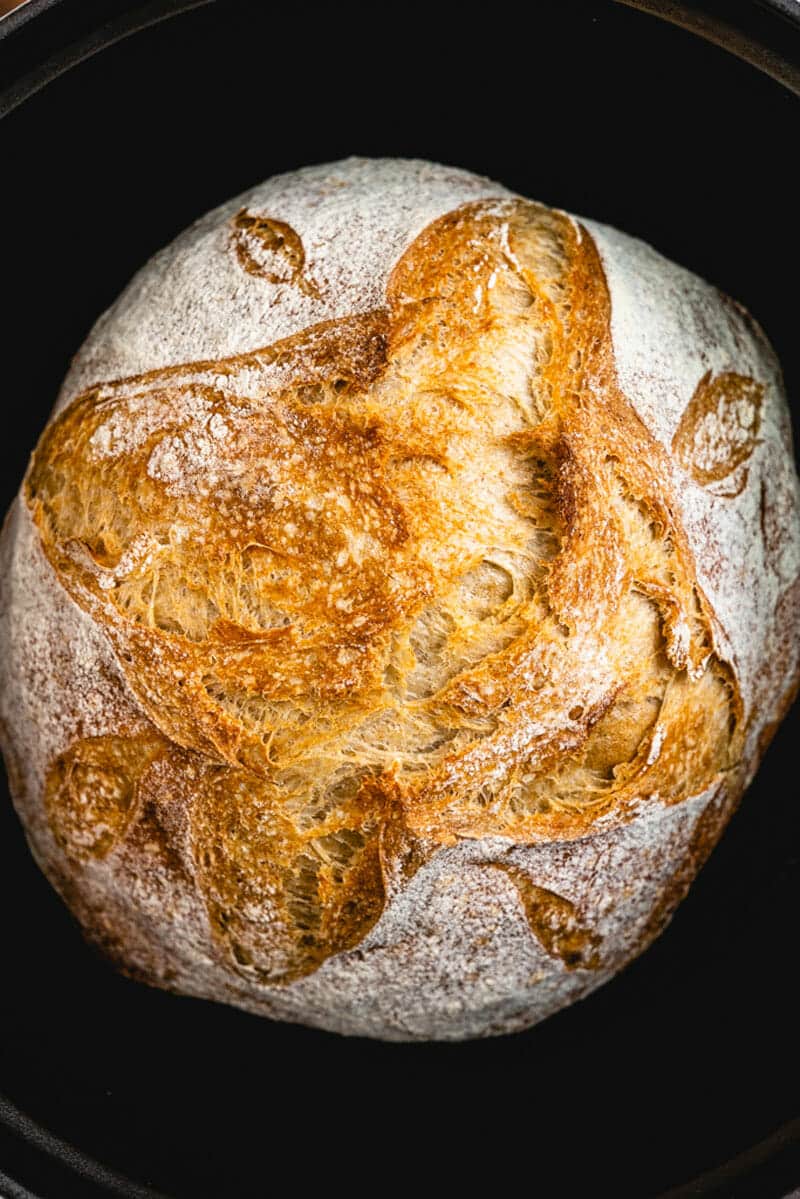
See those beautiful lines on the top of the artisan bread? Those are called score lines. Scoring is slashing the top of the dough with a sharp knife to allow it to expand when baking. You can also make a decorative sort of pattern on the bread. Here are a few tips for scoring no knead bread:
- Use your sharpest knife, or a lame. You’ll want the knife to be ultra sharp. We purchased a lame for this, since we make lots of bread recipes.
- Make shallow cuts into the top of the dough. You want to cut just the surface — if it’s too deep it collapses, if it’s too shallow it bursts. Alex did this cross pattern for the bread scoring in this photo!
What’s a Dutch oven? Do I need it?
This easy no knead bread is best when baked in a Dutch oven. Why? Baking bread in a covered Dutch oven holds in the steam that the bread releases as it cooks. This makes an extra crispy crust & perfect rise. If you don’t have a Dutch oven, you can use a pizza stone (see below).
What is a Dutch oven? It’s a heavy cooking pot with a lid used for braising meat and making soups and stews. You can use it on the stovetop or in the oven. All Dutch ovens are made of cast iron; some have an enamel coating that makes them easier to clean.
- What’s the best Dutch oven? Here’s the one we use for bread: Lodge 6 Quart Cast Iron Dutch Oven.
- What can I make with a Dutch oven? You can make all sorts of things, from risotto to soup. Go to 12 Easy Dutch Oven Recipes.

Or, use a pizza stone to bake no knead bread!
You also can use a pizza stone to bake this no knead bread! The best way is with a Dutch oven, but if you don’t have one you can use a pizza stone. You’ll also have to make extra steam in your oven. To do that, you’ll use a baking sheet and pour boiling water onto it right when you add the bread. This creates steam, which makes that crispy crust.
- What’s the best pizza stone? Here’s the pizza stone we recommend.
- What can I make with a pizza stone? PIZZA! Try our Pizza Dough Master Recipe & 20 Best Pizza Recipes!
Storing no knead bread
This no knead bread has no preservatives, so the storage recommendations are different from a bread you might buy from the store. Here’s what to do:
- Room temperature storage (2 days): Once you’ve baked your homemade bread, it is best eaten within 48 hours. We store ours wrapped in cloth at room temperature. Use a clean dish towel or a bread bag.
- Frozen (3 months): Or, you can freeze it! It’s easy to cut your bread in half and freeze half of it! Let it cool to room temperature, then cut it into slices and place it into a sealed bag or container.
Step it up! Slather it with Herbed Compound Butter.

This no knead bread recipe is…
Vegetarian, vegan, plant-based, and dairy free.
Print
Easy No Knead Bread Recipe
- Prep Time: 1 hour 30 minutes (including overnight)
- Cook Time: 40 minutes
- Total Time: 2 hours 10 minutes
- Yield: 12 to 14 slices 1x
Description
This homemade no knead bread will wow everyone! It’s so easy to make and has the best flavor, crispy crust, and chewy interior. Great for beginners!
Ingredients
- 3 cups all purpose flour (375 grams)
- ½ cup whole wheat flour (62 grams)
- ½ teaspoon instant or active dry yeast
- 9 grams 1 ½ teaspoons kosher salt
- 1 ⅓ cups water (314 grams)
- 1 tablespoon apple cider vinegar (15 grams)
Instructions
- Mix the dough & rest overnight: In medium bowl, stir together the all purpose flour, whole wheat flour, yeast and salt. Add the warm water and vinegar and stir with a wooden spoon or dough whisk until all flour is incorporated. Place the bowl in a proofing bag or cover with plastic wrap. Rest at room temperature overnight (12 to 18 hours). The resulting dough will be bubbly and very sticky.
- Shape the dough: When ready to bake, remove the dough from the bowl onto a clean, lightly-floured countertop. Gently spread the dough into a square and then fold up each side into a packet. Flip the dough over. Place your hands behind the dough and gently pull the dough towards you to increase the tension on the surface of the dough. Rotate and repeat until you have a boule shape. Follow this video tutorial for boule shaping technique.
- Proof the dough for 1 hour: Place the boule on a piece of parchment paper about twice the width of the boule. Cover the dough with an inverted large bowl and rest one hour.
- Preheat the oven: Preheat the Dutch oven (with lid) at 475°F for 30 minutes. (Or for the pizza stone method, place the pizza stone on middle rack of oven, off to one side. Place a cast iron pan or thickest baking sheet on the rack just below and off to the other side of oven. You’ll pour water into it later to create steam.)
- Score the bread: Use a sharp knife or lame to cut several shallow slits at angle across the top of the dough. The photographs show this cross pattern.
- Bake for 16 minutes: Working quickly and carefully with oven gloves or mitts, transfer the dough on the parchment paper to the preheated Dutch oven, then place the top on. Bake for 16 minutes. (Or for the pizza stone method, transfer the dough on the parchment paper to the preheated pizza stone. After the bread is on the the stone, make the steam: cover your hand with a towel and very carefully pour 1 cup of water onto the cast-iron pan or baking sheet, then immediately close the door.
- Reduce to 400°F and bake for 25 to 27 minutes: After the 16 minutes, reduce the oven temperature to 400°F. Remove the Dutch oven, carefully take out the bread, and set the bread directly onto the oven rack. (Or for the pizza stone method, open the oven door a couple of times to fan out excess moist air.) Bake for an additional 25 to 27 minutes, until hollow when tapped or internal temperature is at 205 to 209 Fahrenheit. Remove the bread from the oven and allow it to cool on a cooling rack for at least 45 minutes. After cooling, the bread is ready to eat. Store the bread wrapped in cloth or in a bread bag on the counter for up to 2 days, or freeze (sliced) wrapped in foil in a plastic bag for several months.
- Category: Bread
- Method: Baked
- Cuisine: Artisan
- Diet: Vegan
Keywords: No Knead Bread, No Knead Bread Recipe, Easy Bread, Easy Bread Recipe


Should I make the no knead bread or the artisan loaf? What’s the difference taste or texture wise?
They both taste great! The no-knead is definitely easier, the artisan loaf has a little better flavor and chewier crust.
This is probably a dumb question, but does the parchment paper go in the Dutch oven with the dough for baking?
None of your pictures show parchment paper, so I’m guessing no.
Yes! You drop the parchment paper into the dutch oven.
Are there any alternatives to using parchment paper? None on hand and can’t get to the store. Thanks!
You can just move the dough without parchment paper, just be careful not to misshape it too much.
I made my first boule yesterday, but it didn’t rise as high as I would like. The taste is good and the texture is excellent…….very crunchy crust and chewing moist inside. How can I get it rise higher? Would letting it proof without A/C help?
Hi! Yes, or just place it in your oven with the light on for slight warmth.
How would it turn out if I substituted coconut flour for the wheat flour?
That wouldn’t work, sorry! The gluten is necessary for this one.
Can I use only white flour
Yes
Hi Alex, I’ve made your sourdough bread and the starter when living in Northern Cali. After lots of love, It came out GREAT! I LOVE your recipes. My favorite go-to recipe site. Now, I’m living in Idaho so trying this recipe as I’m not sure how to the starter will do here. Anyway, I noticed on step 7 of this recipe you state to reduce oven temp to 400° for 25-27 then after 16 min, reduce to 400°. Was that a typo? Will you please clarify? Thanks, Jackie :)
Hi! Step 6 is baking the bread for 16 minutes at 475F, then Step 7 is reducing temp to 400F and baking on rack for addition 25 minutes.
Hi – when you say put the bread directly onto the oven rack do you mean with or without parchment paper?
Hi! Without the parchment paper.
A bit that elevates your site in the sea of food stuff is the table of print options to include or exclude portions of the page & set recipe text size. That capability should greatly improve screen readibility when preparing the dish. Cooking is far too often unnecessarily complicated by modern “conveniences” alleged to accelerate & simplify. Ooo, streamliner food preparation… Ride that bullet train of the 50s of the future. Them baked donuts is lookin’ real good, too. Don’t let them civilians gitcha to add too many extras. Sprinkles & such ain’t nuthin but chrome stripes on a slow race car. They look nice but don’t make it go fast. How ’bout them quick breads? A few years back, I discovered citrus-berry breads are more enjoyable cold, vs warmed like banana-nut bread. While exploring that facet on the road to pina coloda bread, I hit a wall. How does merely adding shredded or flaked coconut to a recipe make the bread too chewy? Thanks much
★★★★