
This post may include affiliate links; for details, see our disclosure policy.
This homemade pizza dough recipe really is the best! Here’s how to make pizza dough with the perfect fluffy, chewy texture—every time.

Ready for next level pizza dough? Here at A Couple Cooks, we’ve spent the past decade becoming homemade pizza experts. We’ve interviewed chefs, done endless research, and even made a few trips to Italy to taste the real thing. So it’s with pleasure that we share our very best pizza dough recipe! You don’t even need special equipment: just your bare hands and a passion for pizza. Here are all our secrets on how to make pizza dough!
Best flour for pizza dough
What makes best possible homemade pizza dough recipe? Using great flour. Our top choice is the flour that professional pizzerias use, called Tipo 00. But you can use other types of flour if you have them on hand or can’t find Tipo 00. Here’s what to know about types of flours for pizza dough:
- Tipo 00 flour, a finely ground flour used in Italian cuisine, is the best choice for pizza dough. Its strength and elasticity make a light and airy crust with a crispy exterior. The high gluten content lets the dough stretch easily without tearing, creating a fluffy, chewy texture. Tipo 00 is becoming more widely available at American grocery stores, or you can order it online.
- Bread flour, a type of flour that is high in gluten and protein, can also be used for pizza dough. The high protein content helps to create a nice chewiness in the dough. The main disadvantage of this type of flour is that it’s not as light and airy as Tipo 00. But if you have it on hand, it’s preferred over all-purpose flour.
- All-purpose flour also works for this homemade pizza dough recipe. The main advantage is that it’s widely available and inexpensive. However, the gluten content in all-purpose flour is not as high as Tipo 00 or bread flour flour, making the pizza crust slightly more dense and crumbly. However, all-purpose flour still makes for an excellent homemade pizza dough!
How to make pizza dough
Making homemade pizza dough is a fairly simple process. The only part that requires some skill is the stretching. There is also some proofing time involved, so make sure to factor that in to your pizza night! Here are some things to know about how to make pizza dough: or simply go right to the recipe!
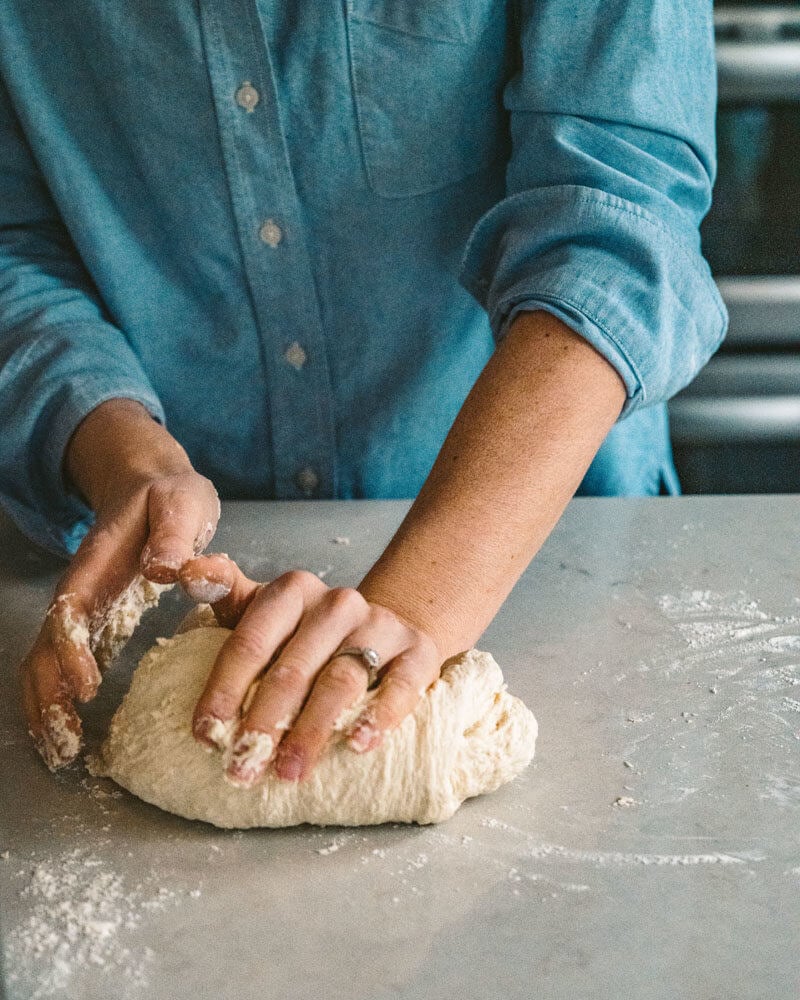
Knead the dough by hand, or use a stand mixer.
Contrary to what you might think, you don’t need any special equipment for pizza dough. You can knead it by hand! We love the tactile nature of hand kneading and it comes out great. However, if you do have a KitchenAid or stand mixer, it does a fantastic job and is totally hands off. The kneading time in both cases is 8 minutes.
Allow the dough 45 minutes to rise.
Kneading takes only 8 minutes, so most of the time required for making pizza dough is letting it rise or “proof.” Set each dough ball on a floured surface, dab with olive oil, cover with a damp towel, and allow them to rise at room temperature until doubled in size, about 45 minutes to 1 hour. So, make sure to start making the recipe about 1 hour before you’d like to eat your pizza. You can also make it in advance and refrigerate: keep reading!
Refrigerate the dough 1 to 3 days prior to baking (optional!).
Here at A Couple Cooks, we’ve interviewed some top rated pizzeria chefs in America and they all agree. For the best pizza dough, make it in advance and refrigerate it for 2 to 3 days before baking. This naturally ferments the dough, infusing a nutty, complex flavor. Of course, thinking ahead by 2 to 3 days is not always possible! You can skip this step and the dough still tastes incredible. (Promise.)

Tips for stretching the dough
Do you have to throw homemade pizza dough into the air like in your favorite pizzeria? While it looks fancy, this type of stretching is not required for homemade dough! It’s easiest to learn by watching: watch our How to Stretch Pizza Dough video before you start. Here are a few tips for stretching pizza dough:
- Prep the dough: Place the dough on a lightly floured surface. Dust the top of the dough with flour.
- Pat into a circle: Pat the dough into a circle, then drape it on your knuckles to stretch it. If the dough resists stretching, set it down and let it rest for 1 minute. Once you pick it up again, the gluten will have relaxed and it will be possible to stretch.
- Drape the dough over your knuckles: Once you have about an 8-inch circle, pick up the dough and gently drape it over the knuckles on both of your hands. Slowly rotate it around, allowing gravity to stretch it into a circle about 11 inches in diameter. If it resists stretching, put it down and allow it to rest for a few minutes, at which point it will stretch more easily.
Can you freeze pizza dough?
Yes! You can freeze any pizza dough balls you don’t plan to use the day of. After it rises, place it in a freezer proof bag and remove extra air with a straw. Freeze for up to 3 months. Go to How to Freeze Pizza Dough for more about how to defrost the dough when using it.
Pizza dough variations
This homemade pizza dough recipe produces a deliciously fluffy pizza crust that’s crisped on the outside and chewy on the inside. It’s perfect for a standard, artisan-style pizza. But if you’re looking for something different, here are a few variations on this pizza crust recipe:
- Thin crust: This Thin Crust Pizza Dough is similar to this recipe, but with a thinner crust! It’s slightly easier to make because you can roll the dough out instead of stretching it.
- Pan pizza: Try Perfect Pan Pizza, with a thicker crust made in a cast iron pan.
- Focaccia pizza: This Focaccia Pizza is simple to make with an extremely thick, fluffy crust.
- Sheet pan pizza: Make a big Sheet Pan Pizza, the equivalent of 3 medium pizzas.
- Pizza oven dough: This Pizza Oven Dough is optimized for an outdoor pizza oven (though the recipe below works as well).
- Gluten free dough: This Gluten Free Pizza Dough is stretchy and satisfying, perfect for those with special diets.


This pizza dough recipe is…
Vegetarian, vegan, plant-based and dairy-free.
Print
Best Homemade Pizza Dough
- Prep Time: 1 hour
- Cook Time: 0 minutes
- Total Time: 1 hour
- Yield: 3 medium pizzas (about 11 inches in diameter) 1x
Description
This homemade pizza dough recipe really is the best! Here’s how to make pizza dough with the perfect fluffy, chewy texture—every time.
For the best possible pizza dough, we recommend this pizza stone. Here’s why we love it.
Ingredients
- 500 grams* Tipo 00 or all-purpose flour (3 ⅓ cups)
- 8 grams instant or active dry yeast (2 teaspoons)
- 7 grams kosher salt (1 teaspoon)
- 338 grams warm water (1 ¼ cups + 3 tablespoons)
- 13 grams olive oil (1 tablespoon)
Instructions
- Combine the flour, salt, and yeast in a bowl or the bowl of your stand mixer. Stir to combine. Add the water and olive oil and stir until a raggy dough forms. Turn the dough out onto a floured surface.
- Knead the dough by pushing with the base of your palm, then reforming it into a ball. Continue kneading for 8 minutes until the dough feels pillowy and has a smooth, stretchy exterior. If the dough is very sticky, add a small amount of flour while kneading. Alternatively: attach the dough hook to a stand mixer and start the mixer on medium-low speed, then allow the mixer to knead for 8 minutes.
- After the kneading is finished, divide the dough into 3 equal pieces. Using floured hands, gently shape each half into a boule (ball shape) by folding the dough under itself. Set each boule on a floured surface and dab the dough with a bit of olive oil to keep it moist. Cover all boules with a damp towel and allow them to rise at room temperature until doubled in size, about 45 minutes to 1 hour.
- The dough can be used immediately: go to Step 6. For next-level flavor, you can transfer the dough to separate sealed containers, large enough for the dough to double in size again, and store in the refrigerator for 2 to 3 days. (We don’t always do this, but we try when possible because it makes for a noticeably nutty, unique flavor that truly is the best homemade pizza dough you’ve ever had.) You can also freeze pizza dough you don’t plan to use that day.
- **If you’re using the dough after refrigerating: The day of serving, remove the dough from the refrigerated containers, place it on a lightly floured surface covered with a towel, and allow it to come to room temperature before stretching, 30 to 45 minutes. (This is not required if you’re using the dough immediately after proofing.)
- To stretch the dough, place it on a lightly floured surface and gently press it into a circle, flipping several times and adding a pinch of flour if it is too sticky. Once you have about an 8-inch circle, pick up the dough and gently drape it over the knuckles on both of your hands. Slowly rotate it around, allowing gravity to stretch it into a circle about 11 inches in diameter. Do not overwork or fold the dough. If the dough starts to resist stretching, put it down and allow it to rest for a few minutes, at which point it will stretch more easily.
- We bake our pizzas at 500F and use a pizza peel to transfer it to a preheated pizza stone in the oven: the bake time is around 5 to 7 minutes. See our pizza recipe posts for baking instructions.
Notes
*Using a food scale will ensure you have consistent results every time! We use this one.
- Category: Essential Recipes
- Method: Baked
- Cuisine: Italian
Keywords: How to make pizza dough, Best homemade pizza dough, Best pizza dough recipe, Making pizza dough
More pizza recipes & resources
Here are a few more of our best pizza resources and recipes on A Couple Cooks:


That’s the secret I don’t think I leave mine long enough also do you have to let it come back to Rome temputure or can you use it straight out of the fridge
Hi! You do need to let it come to room temperature before cooking, otherwise it’s too hard to stretch!
Hello, I absolutely love this recipe. The only change I make is that I use whole wheat and I lil dab of honey I always make 2-3 days ahead of time and the reward is AMAZING!
Thank you so much for all the tips.. oh I should add that I pre bake for 2-3 minutes then top and bake for 7 minutes at your recommended temp of 500°. oh I just can’t say enough how great it is!
Quick question! The recipe in your book uses instant yeast, and this one uses regular active dry yeast… what is the reason for this difference?
Hi! Sorry for the confusion, Instant or Active Dry yeast will both work for this recipe!
Thanks for the quick response! Making the dough today to have pizza on Friday – will update you on how it goes!
Please let us know how it turned out!
Are you able to freeze this pizza dough
Yes! Freeze after the first rise and thaw 24 hours in the refrigerator.
I would love a gluten free, vegan, vegetarian pizza recipe that’s a safer alternative for Autism. Thank you.!
What is the serving size for this?
Hi! The nutrition info is per slice.
If I am to refrigerate the dough do I still need to cover it with a damp towel and allow it to rise before putting it in the refrigerator or I just put it in directly?
You still let the dough rise before refrigerating! Thanks for clarifying :)
I just mixed my dough following your instructions, and did not activate the “active dry yeast” which was against my instincts. I haven’t done a slow ferment before though so thought it’d be best to follow the instructions. Now I see graduals of yeast on my dough… do I need to start over? If so, it’s be helpful to make it clear to people that it needs to still be activated first!
Hi! No, your bread should rise just fine!
It is rising! Thank you, and sorry for the spelling errors (autocorrect!). I’m shocked and stoked, I had no idea it would still work without activation. Should I have activated it first for the most optimal results? Thanks!
We never activate the yeast for our breads and have never had an issue.
Hello! When I clicked on the Tipo 00 link you provided, it took me to Amazon with a listing of a brand called Antimo Caputo soft wheat flour. Is this the brand you use for your pizza dough? There seem to be so many different brands out there. I want to make sure I use the same one you use. If you can send a screenshot of the exact one that would be great. Also, I tried your pizza sauce recipe and love It! Sad to say I am not very good in the kitchen, but I like your simple recipes and the pizza sauce was a hit! Thank you for providing such wonderful tried and true recipes that are easy enough for me to try.
Hi! Yes, the Antimo Caputo brand is the one that we usually buy. We’ve tried several brands and they’ve all worked well. If you try the Tipo 00, definitely do the slow rise in the fridge for 2 to 3 days, it makes a HUGE difference on flavor.
Happy cooking!
Have you tried making pizza using a GF flour? Costco makes a really good all purpose GF flour and there are also several other specialty kinds as well. Curious how this would turn out with GF flour???
I haven’t tried it. Sorry!
Can I leave it to ferment for 5 days. I want to make on a Sunday for a Friday event
Hi! I’ve not tested five days, but I think it maybe end up overproofing a bit and could expand beyond your containers…
I’m excited to try this recipe. I have one concern though. The amount of yeast is 8 grams, where most recipes I’ve tried require much, much less. Will this amount have any affect on the taste of the dough? With so much yeast, will it just keeping rising through the 2-3 days of fermenting?
It will keep rising for the 3 days, but as long as it’s refrigerated it only doubles in size.
I tried this recipe, due to the simple calzone recipe. I did not let it sit a day or more in the fridge but I did start it early and let it sit in the fridge for 6 hours. This was the first time i have ever made pizza dough at home and it turned out perfect texture/feel wise. I had only wished I had tried adding some flavor into the dough like garlic powder, basil flakes, and a bit of extra salt maybe. Next time I try to do calzones again and I use this recipe for the dough I may experiment. I didnt even taste salt from what was listed in the recipe. Was just flavor of plain dough and of course what was added inside. But I loved how when I followed the directions it came out perfect to work with. I’ve tried different bread recipes and even when following directions stuff doesnt seem to turn out as great. A lot of messy recipes had me staying away from anything online for a good while. This one was perfect and easy to work with. Thank you so much for sharing it and glad i took a chance on it.
So glad you enjoyed the recipe!
Thank you for your recipe,
I will be using fresh yeast instead of instant or active dry, so I am wondering about the conversion.
You mention 8 grams of either active dry or instant. Now for active dry I would need to use twice as much fresh yeast, and for instant four time as much. Therefore could you tell me which one you used?
Thank you,
Hi! I’ve used both to good effect. Just allow to rise until doubled in size!